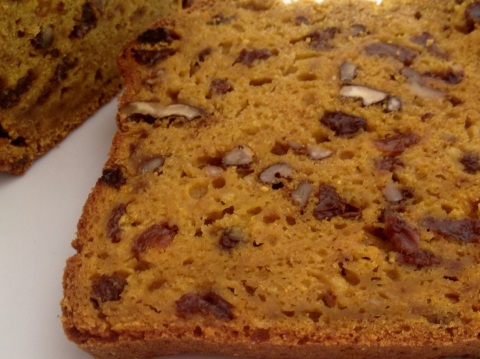
Pumpkin Bread
It all started when I was cleaning out the fridge. I was faced with yet another piece of pumpkin destined to end up in the compost heap. It seems I am incapable of buying just enough pumpkin for my family, I always buy about three-times too much. Surely there was something I could do with this pumpkin before it made its sad way into my backyard?
The idea actually came from Sonia over at Natural New Age Mum. Sonia has been posting heaps of banana bread recipes all week. I often make banana bread to use up old yukky bananas, so why not use up my pumpkin the same way? Before we get into the recipe, I have a hot tip for you: if you have too much pumpkin, give it a quick steam (or boil) and mash it. Pumpkin freezes really well like this and can then be used in baking or reheated for dinner.
What you need:
1/2 cup coconut cream
1 1/3 cup mashed pumpkin, cooled
3 eggs
1/4 cup coconut oil, in liquid form – but not hot
2 1/2 cups plain flour, use spelt if you have it – I would normally use spelt, but have run out of it
1/2 cup maple syrup
1 tbs baking powder
1 tsp ground cinnamon
1/4 tsp ground cloves (1/2 tsp of whole cloves will give you 1/4 tsp ground)
1/4 tsp mixed spice
1 cup raisins
1 cup walnuts, chopped roughly
What you need to do:
- Preheat oven to 180°C. Grease a loaf tin with coconut oil.
- Combine coconut cream, pumpkin, eggs, maple syrup and oil. Whisk to combine.
- Add in flour, baking powder and spices. Stir well, making sure there are no lumps of flour.
- Stir in raisins and walnuts.
- Pour into tin and smooth the top of the batter.
- Bake for 40-50 minutes. The loaf is cooked when a skewer inserted into the middle comes out clean. (Confession time, this cooking time is purely a “guess-timate”. I have been having terrible trouble with my oven lately. The temperature varies wildly every 10 minutes it seems. It took me 1 hour and 20 minutes to cook this loaf. Based on other things I have been baking, I know that this is a very extended time. If your oven is behaving, you should have your loaf finished by 50 minutes.)
- Turn out onto a wire rack and let cool slightly before slicing.
Enjoy!
PS. If you are after a great banana bread recipe, try this Banana Bread. I made this through the week making the following changes: blueberries for strawberries, C Berry Blast for Acai Berry Blend, rapadura sugar for coconut sugar and wheat instead of spelt. It was very yummy.
Cashew-Rice Milk
When we learned that Keane had a dairy allergy, my main concern was finding a suitable milk replacement for cooking. His specialist recommended a rice milk with added chickpea protein in it. We have used this for the last year, but now, thanks to my latest kitchen gadget the Bellini Intelli-Kitchen and Jo from Quirky Cooking I have been able to experiment and can now make my own milk for Master Keane. You can find my inspiration, Rice-Almond Milk, here.
This recipe makes approximately 800ml of milk. If you like, you could add filtered water at the end to make it up to the 1 litre, but I find it much creamier and “milkier” without adding extra. This milk does froth up a little, so can be used for lovely lattés or cappuccinos.
Ingredients:
- 50g brown rice
- 50g cashews
- 1L water
Method:
- Grind rice in machine for 30 seconds on Speed 9
- Add cashews, and grind for another 30 seconds on Speed 9
- Pour in water and cook for 7 minutes, Speed 3, 60°C
- Strain through muslin cloth
- Cool and enjoy!
Method for those without the Intelli-Kitchen or Thermomix:
- Grind rice in food processor until it looks like breadcrumbs
- Add in cashews and process until broken down (stop before it starts forming a butter)
- Scrape out the rice and cashews and add to a saucepan with water.
- Cook on medium for about 7 minutes. You will need to stir this and keep an eye on it. Don’t let it catch on the bottom of the pan.
- Strain through muslin cloth
- Cool and enjoy!
I have used the cashews as I find they make the milk very creamy. I have found this consistency is excellent for baking; it isn’t as watery as when I made the milk with rice alone.
You can also dehydrate the pulp that is left behind and use it as a flour replacement in your baking or use it straight away if you are cooking something. The last time I made this I was making fruit buns (Spelt Hot Cross Buns without the crosses),so I used the pulp as part of the milk amount needed. It added a lovely flavour to the buns.
So, there you have it – super easy, super cheap and super tasty. I can now save $6.00 a week on rice milk, and make my own organic milk for a fraction of the cost!!
Date Energy Balls
Looking for a tasty, dairy-free snack? These yummy date balls are one of my son’s favourites snacks. They are easy to make, naturally sweetened, super healthy and yummy. What more could you ask for….?
What you need:
1 tablespoon cacao nibs
50g almonds
50g macadamia nuts
40g shredded coconut
170g oats
50g chia seeds
1 teaspoon ground cinnamon
1 teaspoon vanilla paste
500g pitted dried dates
1-2 tablespoons water
What you need to do:
- Place cacao nibs, almonds, macadamia nuts and coconut into a food processor.
- Blend for 20 seconds, until finely chopped.
- Add in remaining ingredients, except water.
- Blend 15-20 seconds.
- Add in water and pulse a couple of times.
- Remove blades, if possible, or tip mixture into a bowl.
- Using damp hands, form mixture into balls. You will need to squish it together so that it sticks. This is a very sticky process – I find keeping your hands wet prevents the mixture sticking to your hands too much.
Once balls are formed, keep in the fridge or freezer. I keep ours in the freezer as I find they last longer and I like the chewy texture.
Bone Broth
When I was studying, part of my Naturopathy course involved taking a class called Food as Medicine. It opened my eyes to the foods that are not only good for us, but can actually help us heal. Bone broth is at the forefront of healing foods. A quick search on the internet on the benefits of bone broth will bring up hundreds of articles outlining why this simple food is so very good for us.
Here is a quick list of what bone broth can do for you:
- helps rebuild cells that are stronger and healthier
- suppresses inflammatory activity
- keeps joints, bones, ligaments and tendons healthy
- can help destroy gut parasites, while rebuilding gut tissue
- great for hair and skin condition
- helps aid in liver detoxification
How does it do this? Well, the long and slow cooking method leeches out all the minerals, collagen and amino acids that are kept in the bone and marrow of the animal. These are some pretty important building blocks that our bodies need for function and structure.
What you need to make bone broth:
- 1kg of bones – it is REALLY important that the bones come from organically, pasture-raised animals. Just think of all the garbage that is stored in the bones and marrow of animals that are exposed to chemicals from birth, trust me, you don’t want to be drinking that! I purchased my beef neck bones from Wray Organics and they only cost me $7.00. It made just over 4L of stock, so it works out to be quite reasonable.
- about 1/4 cup of apple cider vinegar – this helps with the breakdown of the bones
- 2 onions, quartered
- 3 carrots, chopped
- half a celery, chopped – use the leaves and all
- bouquet garni
- 10 peppercorns
What you need to do:
Roast bones for 30-45 minutes at 200°C. Then, throw bones and other ingredients into your slow cooker and cover with water (room temperature, not boiling). Turn on low and walk away. I left mine on for 16 hours. The beauty of the slow cooker is that you don’t need to check it, or stir it or worry that it is going to burn, you can just leave it be. Of course, you can do this on your stove top, but you will need to pay it a bit more attention.
After at least 12 hours (anywhere up to 24 hours) you need to strain your stock. This is the way I prefer:
- use a normal strainer or colander to separate the solids from the liquid
- using fresh clean muslin cloth each time, strain twice
I like doing it this way, because when the stock cools you are left with very little fat in your broth. I only need to pick off a few small blobs. If not using within a few days, freeze in portions that you will use. I have some frozen in cup portions and some in ice cube trays.
How to use your broth:
- Drink it – I couldn’t believe it, when I made my first batch my 2-year-old asked for some, and drank it straight from the cup! High-five to me!!
- Use it as stock. I have found that this has a very “meaty” taste and can be a little overpowering. I am using it diluted 50:50 with water as stock replacement
- On her blog, Sarah Wilson recommends using it to sauté vegetables instead of using oil
So, now that you know how easy it is to make and how awesome it is for you, you have no excuse not to try it!!
For more information, you can check out these sites:
http://www.naturalnews.com/040493_bone_broth_immune_health_nutrients.html
http://undergroundwellness.com/top-5-reasons-why-bone-broth-is-the-bomb/
http://www.sarahwilson.com.au/2012/01/how-to-make-bone-broth-and-why-you-should/
Caramel Mud Cake
So, I am now into Week 4 of eating no sugar. None. Nada. Zip. It has been a strange experience. I was surprised on Day 1 & 2 how it didn’t seem to affect me. Then Day 3 hit. Oh dear. Then there was Day 4. Let’s not even go there. It has been an extreme rollercoaster of calm and cool, not caring about sugar to a nail-biting, murder-anyone-in-sight-to-get-my-hands-on-any-morsel-of-any-kind-of-sugar. I think you get the point.
Throw into this mix a birthday. My birthday. A big one. It may contain a “0” and “3”, but not necessarily in that order. So, as a self-confessed cake lover (I love making them, decorating them, and eating them) how am I to have a big birthday without a big cake?
My favourite has always been white chocolate mud cake. It was the cake we had at my 21st birthday. It was my wedding cake. Sadly, it won’t be my 30th birthday cake. Why? It’s too hard to try and make a low-refined-sugar version.
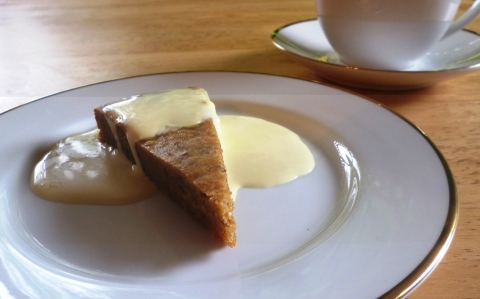
Step up, Caramel Mud Cake! Sweet, dense, moist, rich, yum and oh-so-easy to make. Now, this version is not sugar-free (but I will be treating myself to a slice anyway!). I think you will be hard-pressed to come up with a decent tasting mud cake with no sugar in it. The beauty of this recipe is that it uses dates instead of brown sugar for the caramel-y flavour. My dairy-free friends are going to have to turn away now, I’m sorry, but it’s loaded with butter. Our gluten-free buddies are in luck. Due to the nature of this cake any packet of gluten-free flour with work.
What you need:
Melted butter, to grease pan
100g pitted dates
100ml hot water
100g butter, cubed
100g white chocolate
2 teaspoons golden syrup
1 egg, room temperature
1 teaspoon vanilla bean syrup
75g plain flour (gluten-free if you like)
75g self-raising flour (gluten-free if you like)
What you need to do:
- Place dates and water into a food processor to soak.
- Pre-heat oven to 160°C. Grease and line a round 20cm cake tin.
- Place butter, chocolate and golden syrup into a heatproof dish. Place dish over a saucepan of simmering water. Stir with a metal spoon until melted. Do not use a wooden spoon; the moisture from the wood may cause your chocolate to seize.
- After chocolate mixture is melted, combined and smooth remove from heat.
- Process dates and water until well combined. Add egg and vanilla paste. Pulse until just combined.
- Add in flours and pulse until just combined. Scrape down the sides and incorporate all the flour into your cake mix.
- Turn the motor on a low speed. While motor is running slowly pour the chocolate mixture into the cake mixture.
- When combined, pour into prepared cake tin.
- Bake for 20-25 minutes. Let cool in the pan for 10 minutes before turning onto a wire rack to cool.
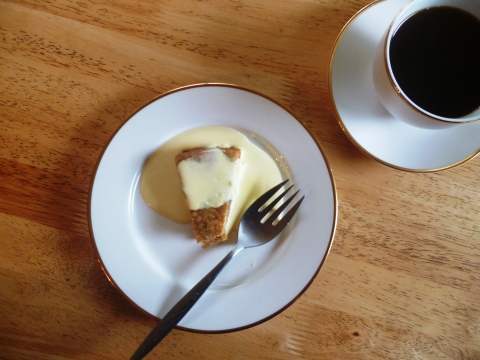
- Serve with a dollop of lovely thick cream.
I have made this as a small cake. It will serve 12 dainty pieces of cake… or 4 pieces if you are my husband. If you need a larger cake, this doubles or even triples well. Adjust your pan size and cooking time. Keep an eye on it in the oven; you don’t want it to dry out.
Enjoy xx
Chocolate. Mmmm, chocolate.
Easter. A chocoholics’ dream.
Easter. A nightmare for those who are dairy, nut and sugar-free. Everywhere you go oversized chocolate bunnies stare down at you. Fear not! Today I am going to share a couple of recipes for those of you avoiding dairy, processed sugar and – let’s be honest – plastic chocolate full of trans-fat and other assorted rubbish.
Keane’s Favourite Chocolate:
I have made one batch of this already this year and will be making another batch for easter. I love that I can give Keane a little treat that he loves and it is actually good for him. It truly is the easiest thing you can make in your kitchen. If you can stir, you can make this chocolate.
What you will need:
1/4 cup coconut oil
1/4 cup cacao powder (I have been having trouble sourcing cacao powder lately, so have been buying the nibs and grinding my own powder. You can also use cocoa powder – go here to see how the Natural New Age Mum compares cacao and cocoa)
2 tablespoons honey – this is a “dark” tasting chocolate, so if you find it a bit bitter, add more honey to taste
2 tablespoons coconut cream
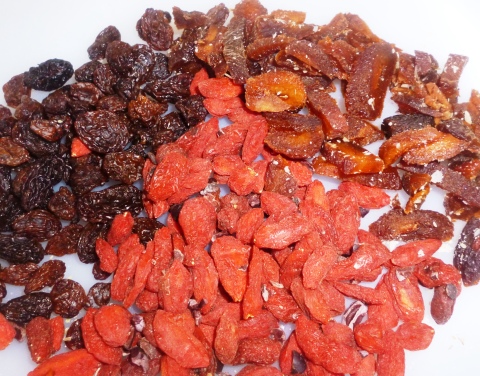
Any extras – I use goji berries, macadamia nuts, cacao nibs, raisins, hazelnuts and almonds – you use what you like.
What you need to do:
1. Combine above ingredients.
2. Line a cake tin with greaseproof paper. Place chocolate in tin and smooth the top.
3. Leave in the fridge for a few hours until set.
4. Turn out onto a board and cut into pieces. You can make them as small or as big as you want.
5. You will need to keep this in the fridge because the coconut oil will melt (unless you live in subzero temperatures!!)
Diary-free truffles:
This recipe calls for dairy-free chocolate. You should be able to find a decent chocolate at your health food shop. I have even found that the Lindt dark chocolate range does not contain any dairy in the ingredients list. Please use your discretion, as it may contain traces of dairy. I have also used Loving Earth chocolate. Both the above do contain a fair bit of sugar, so are still in the “treat” list.
What you will need:
200g good quality, dairy-free dark chocolate (I use 70%, but you can use 85%)
150mL coconut cream
Extras – cacao powder, icing sugar, nut pieces
What you need to do:
1. Bring a saucepan of water to a simmer. Place a heatproof dish on top of simmering water. Make sure the bottom of your dish does not touch the water.
2. Chop your chocolate into pieces and place in dish. Let it melt slowly. Only use a clean spatula or metal spoon. Whatever you do, DON’T use a wooden spoon – if there is any moisture in the wood it will cause your chocolate to seize. Trust me on this.
3. Once chocolate is melted, remove immediately from heat.
4. Pour coconut cream in slowly, while gently stirring. If you want to add any extras to your chocolate, mix in now.
5. Put dish into fridge and let cool until it is firm, approximately 2 hours.
6. When set, take 1 tablespoon amount of mixture and roll into a ball. Roll ball in cacao powder, icing sugar, coconut or nut pieces. Repeat process until all your chocolate is gone. If it is particularly hot, you may need to put your truffle mix back in the fridge to let it re-set. Also, try to keep hands cool and clean (easier said than done!).
7. Try not to eat all at once!
Some flavour suggestions:
Chilli – place whole dried chillies in soft truffle mix. Remove from mixture before rolling into balls. If you really like your chilli, finely chop and leave in the truffle mixture.
Mexican – add 1 teaspoon ground cinnamon and 1/2 teaspoon cayenne pepper to mixture.
Rum and raisin – add 1-2 tablespoons of rum and 2 tablespoons of raisins to melted chocolate mixture. Needless to say, this is an adults only truffle!
Hazelnut – when rolling truffles, place one whole hazelnut into centre.
Also, anything like desicatted coconut, chopped up nuts, dried fruit, etc.
There really are endless varieties of truffles you could make. Feel free to share any flavour combinations of your own.
So, you see, there are options for having a chocolate-y Easter while avoiding dairy. You can thank me later!!
Spelt Hot Cross Buns
If you have been in any Woolworths or Coles, you would notice that Hot Cross Buns have been in store since January – it certainly is a long lead up to Easter!!! If you are after a hot cross bun recipe that doesn’t have vegetable oil, wheat or dairy this is for you. You can make it vegan by following my notes at the bottom.
Spelt Hot Cross Buns:
What you need:
BUNS
1 1/2 cups rice milk
600g spelt flour (I use a mixture of 400g white spelt flour and 200g wholemeal spelt flour, but use whatever you’re comfortable with)
1 teaspoon mixed spice
1/2 teaspoon cinnamon
60g coconut oil (liquid state)
1 egg*
40g honey**
14g dried yeast
120g sultanas***
FLOUR PASTE
75g white spelt flour
2 teaspoons honey**
80ml water, approximately
GLAZE
1 tablespoon honey**
1 teaspoon gelatine****
1 tablespoon water
For those with a bread maker:
1. Add bun ingredients (except sultanas) into machine in above order.
2. Turn machine onto dough function and let it do its magic (don’t forget to add sultanas in at the beep).
3. After completed, lightly dust your bench with spelt flour. Turn dough onto bench and lightly knead.
4. Follow non-machine instructions from Step 4.
For those without a bread maker:
1. Combine honey, yeast and milk in a small jug. Cover and stand in a warm spot for about 10 minutes or until frothy.
2. Combine flour and spices. Sift twice. Pour in yeast mix, coconut oil and sultanas. Cover and stand in a warm spot for 45 minutes or so. Dough should double in size.
3. Lightly dust bench with spelt flour. Knead until dough is smooth. Should not be more than 5 minutes.
4. Divide mixture into 12 or 16 buns, place on a (coconut) oiled baking tray.
5. Make flour paste by placing honey and flour into a small bowl. Add water until a smooth paste forms. Pipe crosses onto buns.
6. Let rise for at least 20 minutes (I make mine at night, keep them in fridge and bake first thing in the morning) and bake for about 20 minutes in 220°C oven.
7. Turn buns onto rack. Turn them right side up.
8. Make glaze by combining ingredients in a small saucepan and stir until gelatine and sugar have disolved. Do not allow to boil. Brush hot glaze over hot buns.
9. Let cool slightly and enjoy!!
*Egg – For a vegan option or for those allergic to eggs: Mix 1 tablespoon of chia seeds with 3 tablespooons of water. Let sit for 10 minutes until a goopy gel has formed. Use in place of egg.
** Honey – For a vegan option you can use 40g of rapadura sugar (or any sugar).
*** Sultanas – Feel free to get adventurous with your additions. Sometimes I add in goji berries, cacao nibs, chopped up dried apricots or even nuts. A low-sugar, dairy-free choc chip would be nice too.
**** Gelatine – for a vegan option you can leave the gelatine out and use a rapadura sugar/water glaze.
If you are looking for a gluten-free options, Jo from Quirky Cooking has a recipe for Gluten-free Hot Cross Buns. I haven’t tried this recipe, but all of Jo’s food I have tried is pretty darn yummy.
Muesli & Chia Pudding
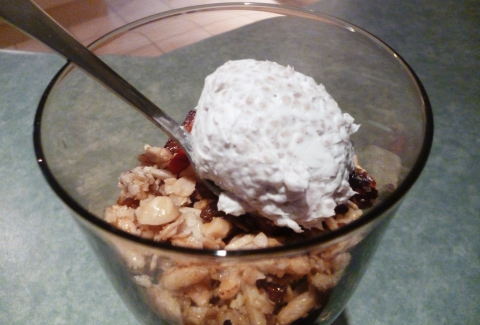 Continuing on from last weeks theme, I have another breakfast recipe for you today. Make this at the start of the week and you won’t have to worry about breakfast for the working week. Packed full of flavour and goodness, it is dairy-free, wheat-free and egg-free. And, this is the breakfast that finally got my hubby eating before work! Win, win, win!
What you need:
1/2 cup oats
1/4 cup quinoa flakes
1/2 cup rice puffs (I found some with no added sugar or salt and GMO free at Woolworths)
1/2 cup macadamias
1/4 cup hazelnuts
1/4 cup shredded coconut
1.5 tablespoons mixed seeds (pepitas, sunflower etc)
3 tablespoons slivered almonds
1 tablespoon maple syrup
3 tablespoons honey
2 tablespoons coconut oil
mixed dried fruit
1 tablespoon chia seeds
1/2 cup coconut cream
1/4 teaspoon vanilla bean paste
What you need to do:
Pre-heat oven to 150°C. Mix honey, maple syrup and coconut oil on a baking tray and heat in oven.
Roughly chop your macadamias and hazelnuts.
Mix together: oats, quinoa, nuts, shredded coconut and seeds together. When the honey mixture is slightly heated, add muesli mix to tray and coat it in the honey.
Bake for about 30 minutes. You will need to keep an eye on this, you don’t want it to burn. Make sure every 5-10 minutes you stir and recoat the muesli mixture with honey. We don’t have our muesli super crunchy, but you could leave it in longer if you prefer it crunchy.
Remove tray from oven and let cool completely. Continue to give it a stir every so often so the honey doesn’t settle and stick to the tray. Chop up dried fruit of your choice (we usually have dried apple, apricot, sultanas, goji berries and cacao nibs) and add to cool muesli. Once completely cool, store in an airtight container.
To make the chia pudding combine chia seeds, vanilla paste and coconut milk. Let sit for a few hours, or overnight.
Serve muesli with a dollop of pudding on top!
Enjoy
Layered Chocolate Chia Pudding
Ok, I’ve got a confession to make. For the last two mornings I have given my son chocolate for breakfast.
*waits for collective gasp of horror*
Before you call child services on me, let me fill you in on our new favourite brekky! It is a play on Heidi’s Chocolate Chia Seed Pudding.
You will need:
2 tablespoons of chia seeds
2 tablespoons of maple syrup
1/2 teaspoon vanilla bean paste
1 1/2 tablespoons of cocoa
1 cup coconut milk
3-4 tablespoons coconut cream**
a few strawberries
1 tablespoon slivered almonds
What you need to do:
Mix maple syrup, vanilla bean paste and cocoa together. Make sure you get rid of any cocoa lumps. Add in chia seeds and coconut milk. Mix well. Leave in fridge overnight, allowing for chia seeds to swell and absorb the coconut milk mixture.
When ready to serve, layer pudding, coconut cream and strawberries. Sprinkle almonds on top and you are ready to go. What I like about this dish is that it is fairly easy to make, it looks stunning, its great for you (chia seeds are AWESOME) and it can even be made ahead to take to work or for when you are out and about.
I suppose you could also have this as a dessert, but really, if you have the opportunity to eat chocolate for breakfast you would be mad not to!!
**When using coconut cream like this, i like to leave it in the fridge. That way, I can use the really creamy part on top which is nice and firm when needing to layer like this. I freeze any leftover watery stuff and use it in curries when I make them.
Chicken stock for the soul…
One of life’s great pleasures is the smell of homemade chicken stock simmering away on the stove. It is a smell that is earthy and comforting. It is also great tasting, healthy, cheap, dairy-free, gluten-free, additive free and oh-so-easy! Put down that cardboard box of chicken-flavoured water and whip up a batch of this yummy stock.
What you will need:
A large stockpot
4 chicken carcasses (organic if you can)
2 carrots (as above)
2 sticks of celery, leaves and all (ok, you get the point, buy organic if you can!!)
1 onion
Bouquet garni
6 peppercorns
Salt to taste
What you need to do:
Put carcasses in the pot and cover with water.
Roughly chop carrots, celery and onion. Throw into the pot along with bouquet garni and peppercorns.
Bring the liquid to a boil and skim the grey goop off the top. Reduce to a simmer and skim every 30 minutes or so.
To start with, the smell is not so great, but there comes a point when it changes from *eek* to *yummy*. This is when you want to add your salt. Start with a little and add to it until it tastes right to you. Don’t forget that the liquid is going to reduce so it is important not to add too much salt. I only add a pinch of sea salt, nothing more.
After about 3 hours, take it off the heat and after it has cooled a bit, strain it through a sieve. Be careful not to press or push any solids through as it will make your stock murky. I strain my stock twice.
Cool for a couple of hours, remove the fat on top and, voila, you have stock ready to go. I make mine and freeze in 2-cup batches so I have easy access for cooking.
At this point I have to apologise, as I when I made this I didn’t take any photos to share with you (can you tell I’m new to blogging??), but when I make our next batch I will update this post.
Enjoy xx
